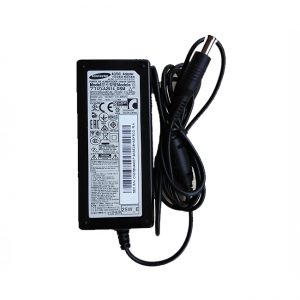
The Perfect Partner for Your Laptop on the Go
Always on the go? Stop lugging your adapter back and forth between home and office. Get a second adapter for your Laptop or Tablet and keep one in the office and one for home or travel.
- Genuine Dell-branded parts undergo rigorous testing by qualified engineers to ensure compatibility and reliability in your Dell system.
- Dell’s sustaining qualification process allows for testing and certification of the newest technology on your Dell system
- Genuine Dell-branded parts mean that you will not need to worry about voiding your system’s hardware warranty.
- Non-Dell parts are not covered under warranty and may void your Dell laptop’s warranty.
- Dell’s Limited One Year Warranty guarantees that if Genuine Dell-branded parts should fail, it will be replaced.
Care And Fix For Yor Laptop Adapter
Troubleshooting Adapter Issues
The adapter cable and power cables may get frayed or cut, and wires may become exposed at either end of the cables. This may be due to the way the cable is wrapped around the adapter, or if the cable is subject to undue stress. If the damage is severe enough to expose wires, you should discontinue using the adapter. To check the adapter, cables, and adapter port on the laptop for any damages:
- Unplug the adapter from the wall outlet.
- Unplug the adapter from the PC.
- Check the adapter and cables (including the power cable) for signs of physical damage or overheating.
- Check if the pin inside the plug or adapter port is bent, broken, or damaged.
- Unplug the adapter from the wall outlet.
- Connect another device on the wall outlet to verify if the wall outlet is working correctly.
- Try a known-good wall outlet.
- Plug the adapter directly to the wall outlet.
Bypass any power regulators like surge protectors, UPS (uninterruptible power supply), power splitters, etc.
- Unplug the adapter from the wall outlet.
- Disconnect any external peripherals that are connected to the PC.
- Remove the battery. Refer to the User Manual of the PC for instructions on how to remove the battery.
If the Dell laptop PC has a non-removable battery, skip this step. - Press and hold the Power button for 30 seconds to drain a residual power from the PC.
- Connect the battery.
- Plug the adapter to the PC.
- Turn on the PC.
- Unplug the adapter from the wall outlet.
- Unplug the adapter from the PC.
- Disconnect the power cable from the adapter.
- Connect the power cable firmly to the adapter.
- Verify if the LED on adapter is on. If no, try a compatible known-good adapter.
Reset the adapter by following these steps:
- Unplug the adapter from the wall outlet for 15 seconds.
- Unplug the adapter from the PC.
- Plug the adapter to a known-good wall outlet.
- Plug the adapter to the PC.
- Check the LED indicator on the adapter.
Using an adapter that has a lower wattage may cause the following issues:
- An error message like “The adapter type cannot be determined. This will prevent optimal system performance” or “Unknown or incorrect adapter detected” may appear.
- Your system may reduce the processor (CPU) speed to save power.
- The laptop battery might not charge or charge slowly.
- The adapter might heat up.
- Check the LED indicator on the adapter.
Dell laptop PCs may use either a 65W, 90W, 130W, 180W, or 240W adapter. For optimal performance, use the adapter that came with the Dell laptop PC. Adapter’s wattage information is printed on the label on the bottom of the adapter.
To verify if the PC is recognizing the adapter correctly:
- Restart the PC.
- When the Dell logo appears, tap F2 key until the message Entering Setup appears.
- Verify the Adapter Type in the BIOS options.
If Adapter Type is None – Ensure to connect the adapter to the PC.
If Adapter Type is Unknown – Follow troubleshooting steps to resolve adapter issues.
Running a hardware diagnostic test can help you identify what the issue may be and provide you troubleshooting steps to help resolve the issue. Dell offers both built-in and online diagnostics. The Dell ePSA hardware diagnostic test checks if the adapter is recognized correctly.
To run the Dell ePSA built-in hardware diagnostics:
- Turn on the PC and tap F12 key at the Dell logo screen.
- Choose Diagnostics from the menu.
The BIOS is firmware that is embedded onto the System Board of your computer. Updating the BIOS to the latest version may help the PC recognize the adapter. Updating the BIOS to the latest version requires the laptop PC to be powered by the adapter and battery.


There are no reviews yet.